Are you doing comprehensive skin assessments correctly?
How to get the best results when conducting a skin health assessment.

Conducting a full-body skin assessment is an important nurse function that helps you do your job and achieve better patient outcomes. “When documented, a comprehensive skin assessment establishes a baseline for the condition of the skin and is essential for developing a comprehensive care plan that addresses the prevention and treatment of skin injuries,” notes Gail Dereczyk BSN, RN, CWOCN, Medline Clinical Nurse Educator.
Here, we review the what, when and how of a proper comprehensive skin assessment.
What is a comprehensive skin assessment?
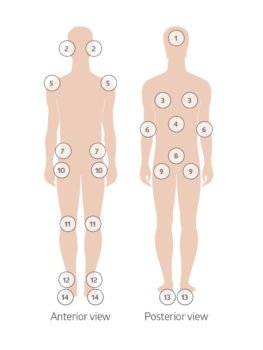 A comprehensive skin assessment entails a close observation and inspection of a patient’s entire body. This means clothing and socks should be off to fully examine a patient’s skin from front to back, head to toe, Dereczyk says.
But a skin assessment is actually more than skin deep. “The more information you have, the better your ability to assess your patient or resident, form a plan of care, and determine any risks for any future injuries,” Dereczyk says. Bottom line, she adds: “You need to have a holistic approach.”
When to do the assessment
It may seem obvious, but the sooner a comprehensive skin assessment is done, the better, in order to set a base level. Ideally, you’re doing them upon admission to the facility or on a first visit when admitted to home care, Dereczyk notes. In both cases, it’s important to not only follow the policies and procedures you work under, but also to know general industry guidelines.
The standard for documentation of admission skin assessment and pressure injury risk assessment set by the National Database of Nursing Quality Indicators (NDNQI) is within 24 hours of admission, while the Institute for Healthcare Improvement (IHI) and Health Research & Educational Trust (HRET) recommend assessment within four hours of admission, and the 2014 International Pressure Ulcer Guideline recommends it within eight hours of admission.1
Skin assessment should be ongoing, however, as Dereczyk explains, “Any time after admission, skin assessments need to occur after any skin inspection or skin check finds deviations from that baseline, or there are reported changes in the skin by the patient or resident, family, or health team member.”
But before you even begin…
Before the assessment, it’s important to do two things:
| Review the patient's chart "Conditions need to be identified that would put the individual at risk for pressure injuries, lower extremity wounds, skin tears or other injuries," Dereczyk says. |
| Conduct a pre-assessment interview. Talk with the patient about his skin and related issues, such as nutrition and mobility. You may also include in the discussion any family members that are closely involved in the life of your patient. Dereczyk advises asking questions that cannot be answered with a simple yes or no and, while listening to responses, also watch for non-verbal cues, such as facial expressions. What to ask your patients:
|
5 steps to success
- Explain. “The first thing you need to do when you’re actually doing the skin assessment is to explain to the patient and family that you will be checking the patient’s entire skin, what you’re looking for and why this is so important,” explains Karen Zulkowski, DNS, RN, CWS, a wound course instructor at Excelsior College. “It’s important that they understand that this is part of the good care that they are receiving at your facility,” adds Zulkowski, who produced a skin assessment training webinar for the Agency for Healthcare Research and Quality (AHRQ).
- Make it safe. Secure a private space for the skin assessment and make sure your patient is comfortable. Minimize exposure of the patient’s body by using a sheet to cover areas not being assessed. Also, know if you’ll need help turning the patient, Zulkowski notes, and make those arrangements ahead of time. Zulkowski also reminds practitioners to wash and sanitize hands before and after the assessment and to wear gloves, changing them as needed.
- Inspect and palpate. There are five key parameters to take note of during a skin assessment:
1. Temperature
2. Color
3. Moisture level
4. Turgor
5. Skin integrity (skin intact?) - Pay attention. Certain body areas require particular observation, as they are more prone to pressure injuries. Dereczyk advises paying close attention to the following:
• Bony prominences
• Skin folds
• Perineum
• Between digits of the hands and feet
• Under any medical device that can be removed during routine daily care - Document, document, document. Even if there are no problems, you should document all results of the skin assessment in the patient’s medical record. It helps to create a standardized place to record results. Zulkowski suggests a checklist, standardized computer screen with key descriptors of the five parameters, or a simple body diagram where staff can note skin changes. Whatever the system, Zulkowksi says, “Make sure all staff knows where skin is documented in medical records.”
Keep up the good work
It’s important to have a standard protocol in place for a comprehensive skin assessment, just like the risk assessment protocols, but a separate process, Zulkowski emphasizes.
Zulkowski says the skin assessment needs to be a “special focus of all the staff” and adds that each unit in a facility should have its own skin assessment protocol. “As people either improve or worsen in their medical condition, they change units,” she says. “You need to always know what their skin looks like.” In addition, Zulkowski notes, when a patient is transferred from facility to facility, a new comprehensive skin assessment should be conducted.
How do you make sure this happens? Dereczyk describes how you can start off strong:
| Communicate. Use data and statistics to help support the need for change to administration. Then let everyone at every level know the who, what, where, why and hows of the change in protocol. |
| Educate. Those doing skin assessments should have a skill validation of their ability to do a proper skin assessment. Education is needed for the staff on normal skin, pressure injuries, skin tears, differentiation of lower extremity wounds, and identification of moisture associated skin damage. |
| Build a team. It’s important for this to be a team effort and for everyone to know exactly what is expected of them. It may be up to you to foster that team culture. |
| Cheer the champions. Identify and empower team members whose leadership or commitment to the cause will help their peers further engage in the change process. |
| Share the success. Provide positive reinforcement and share data to indicate improvement is being achieved. Improvement can help support the process and keep motivating staff to continue. |
References:
- https://members.nursingquality.org/NDNQIPressureUlcerTraining/Module3/PressureULcerSurveyGuide_7.aspx
Other Resources:
- https://www.youtube.com/watch?v=JyqBwGds6o4
- http://woundcareadvisor.com/comprehensive-skin-assessment-vol4-no4/
- https://journals.lww.com/nursing/Fulltext/2010/07000/Performing_a_skin_assessment.20.aspx
- https://www.mometrix.com/academy/skin-assessment/
- https://www.ahrq.gov/patient-safety/settings/hospital/resource/pressureulcer/tool/index.html